Create web graphics with Photoshop – The Fundamentals
Part 2 – Save image for the web / Optimize image for the web

Already know about different image types supported by web browsers, below are some simple steps to save your images for the web with Photoshop.
To save image for the web or to optimize it for the web, you just need to open your image in Photoshop, then go to menu File > Save for Web or File > Save for Web & Devices with CS4, or you can use the combination of keys Ctrl Alt Shift S. No matter what versions of Photoshop you’re using, a dialog box will appear to let you change your image settings and your image size. That’s basically it.
“Save for Web” dialog box:

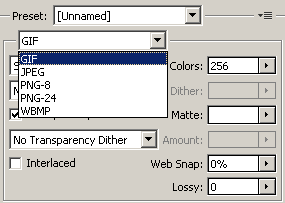
The top part of the Save for web dialog box is for selecting your image type: GIF, JPG, PNG-8, PNG-24 or WBMP. [WBMP supports 1-bit color, or just black and white pixels. Again, you can forget about WBMP since it’s unlikely that you’re going to need it. Even if later you have black and white images, GIF and JPG will suffice.] If you’re not sure what to use, refer to the first post in this series.
Depending on your selection, the underneath parameters will change accordingly. For example, if you selected GIF, the Colors dropdown will be activated; however, if you selected JPG, the Quality slider will be in place of the Colors dropdown. More details will follow later in this post.

The lower right section of the dialog box let you specify the Image Size: For accuracy, it’s recommended to resize and crop your image before you save for web. However, you can specify the size/dimension of your output image here.

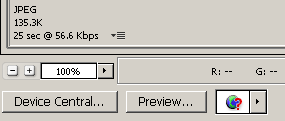
The lower left corner displays information about the output file size and the estimated download time of the image with a selected connection setting [Dial-up, DSL, Cable….]. You can check the download time with different connection settings by clicking on the down arrow icon. Also, if you change your output quality settings, the file size in this area will be updated accordingly right away.

JPG output:
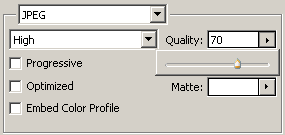
If you’re outputing JPG, a Quality slider will appear letting you select the quality of your web image [compared to the original image]. For example, if you select 70%, your web image quality will be 70% as good as the original image in Photoshop. For web images, the suggested quality range is about 55%-75%. Remember that the higher the quality, the bigger the file size. Also, for computer screen, 70% may LOOK just as good as 100% because in most cases the 30% difference can hardly be recognized by human eye; thus, there’s no reason why you use 100%.
The rule of thumb is perhaps to start with 55% quality; if the image looks fine then just click Save, give it a name, and you’re done. If the image appears to be pixelated with noises or color artifacts, increase the quality to 60% to see how it goes. If you don’t care much about your image file size, starting with 70% probably works best and save you some time.
The Quality slider is probably the function you’ll use the most, and there are more although less common options. Matte: adding a matte color either it’s your background, foreground or other color will add a background color to your image. Matte color is used more for GIF than for JPG. Progressive: if this is checked, the image is compressed in multiple passes of progressively higher detail. However, progressive JPG is not supported by all browsers. Optimized: if this checkbox is checked, your image size will be reduced a little bit. This is the result of Photoshop automatically optimizing your image a little further.

GIF output:
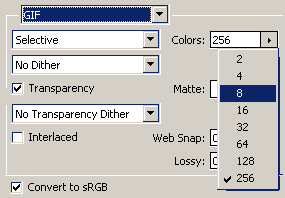
If you’re outputing GIF, a Colors dropdown list will appear letting you select the number of colors you want to use in your GIF. GIF can handle only 256 colors; thus, the max number of colors you see in the dropdown is 256. The more colors you use, the bigger your image file size will get.
The rule of thumb is that if you image [line drawing, icon, logo] has a few colors, then try using less than 256 colors. Again, look at the left side of the Save for Web dialog box to know how big your image file size is and how good the image looks when changing the number of colors used.
Other options include: transparency: select this option if you want a transparent background for your image as seen in the previous post; interlaced: if you want your viewers to see a lower quality version of the image first while the higher quality version revealing on the second pass…

