Archive: Graphics

Web Graphics – Create Web Graphics In Photoshop P3

Create web graphics with Photoshop – The Fundamentals
Part 3 – Essential Tools

Photoshop web graphics

This is the third and probably the last post for the series of posts about Creating web graphics with Photoshop. Part 1 again deals with different image types supported by web browsers; part 2 focuses on saving images for the web; and this part, part 3, is about Photoshop essential tools: the Layer palette, the History palette, Crop tool, Text tool, Eyedropper tool, and Image Adjustments menu.

Why those tools but not the others?

These are the tools I use most frequently to create web graphics and update images on websites. Plus, their usage is the one I often got asked about by others.


Free Online Photo Editing Applications

Want to edit your photos but don’t want to install any software? Use free online photo editing applications.

Free online image editor

Already knew about several great free image editors but don’t feel like them, let’s start exploring some other option: free online photo editing applications. These are web-based applications, so you only need to go to some websites and edit your photos online; and they’re free [at the time of writing this article].

Also, since you don’t have to install anything, you can test out as many applications as you want to find out which one you like the best. There’s no harm done to your computer, again no installation and no un-installation. You may have to sign up for a free account in order to use the application.


Web Graphics – Create Web Graphics In Photoshop P2

Create web graphics with Photoshop – The Fundamentals
Part 2 – Save image for the web / Optimize image for the web

Photoshop web graphics

Already know about different image types supported by web browsers, below are some simple steps to save your images for the web with Photoshop.

To save image for the web or to optimize it for the web, you just need to open your image in Photoshop, then go to menu File > Save for Web or File > Save for Web & Devices with CS4, or you can use the combination of keys Ctrl Alt Shift S. No matter what versions of Photoshop you’re using, a dialog box will appear to let you change your image settings and your image size. That’s basically it.


Web Graphics – Create Web Graphics In Photoshop P1

Create web graphics with Photoshop – The Fundamentals
Part 1 – GIF, JPG, or PNG

Photoshop web graphics

Photoshop is a very deep software, you can play and learn with it for hours, days or even years and probably still discover something new and interesting about it. This post or series of posts aims to provide you with fundamental but easy skills to understand as well as to create better imagery for the web in a matter of minutes.

Part 1 is about image types supported by web browsers: GIF, JPG, or PNG. If you know about this already, then check out Part 2 Photoshop – Save image for the web or Part 3 Photoshop – Essential tools.


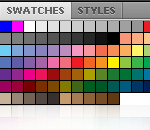
Photoshop Custom Swatch Palette and Custom Color Palette

Create custom color palette / custom swatches palette in Photoshop
Updated for Photoshop CS4

Custom swatches in Photoshop

Photoshop comes with many built-in color swatches palettes. However, more likely the colors in these palettes are not the ones you’re going to use. Without a custom color swatches palette, whenever you want to use your colors, usually you’ve got to manually enter the RGB or CMYK color values. That’s obviously not very efficient considering you may enter the wrong RGB or CMYK values. Thus, if you have certain color palettes that you use all the time, it’s recommended to create your own custom color palettes so that you can easily use them with Photoshop short-cut or the eye-dropper tool.


Favicon – Create Favicon For Your Website

Create favicon — address bar icon, or bookmark icon for your blog, and website.
Updated for Photoshop CS4

Favicon - Address bar icon

This is to show you how to create and add your own favicon to your website or blog – including your Blogger/Blogspot, WordPress… The process is really simple and nearly the same for a website or a blog. First you need to create a favicon with Photoshop or with other tools; then upload the favicon to your website.