How To Use Adobe Acrobat Professional 9

How to use Adobe Acrobat Professional from creating a PDF document, inserting or deleting pages, to creating and editing bookmarks

Creating a PDF document

The free Adobe Acrobat Reader is to read/open a PDF file; to create a PDF document, you need Adobe Acrobat Writer, also called Adobe Acrobat Professional, which is not free. With Adobe Acrobat Professional installed, you can convert almost any type of documents into a PDF by using menu File > Print then select Adobe PDF as the printer; hit OK and you’ll have a PDF document.

If fully and properly installed, the Adobe Acrobat conversion icon will be automatically installed on the toolbar of your main web browser, your document or spreadsheet programs. You can click on the icon to convert the file to PDF.

Editing pages with Acrobat Professional

It’s very easy to insert, delete, or replace pages with Acrobat Professional 9. Everything you need is under the menu Document where you’ll find Insert Pages, Extract Pages, Delete Pages, and Replace Pages and more. Below you’ll find the steps to insert and extract pages. Replacing or deleting pages should be similar, straight forward and very easy, too.

Inserting pages

  • With the target document open, choose Document > Insert Pages > From File
  • Select the PDF file you want to insert into the current document
  • In the Insert Pages dialog box, specify where you want to insert the document such as before the first page or after page 5, hit OK, and you’re done.

Extracting pages

  • With the target document open, choose Document > Extract Pages
  • Specify the range of pages to extract. You can extract one or more pages
  • You can select the optional checkboxes Delete Pages After Extracting or Extract Pages as Separate Files, click OK, and you’re done.

Create new bookmarks with Acrobat Professional 9

  • Click the Bookmarks icon/tab on the navigation panel on the left to bring the Bookmarks palette to the front
  • Click the new bookmark icon to create a new bookmark. Type the label/text for your new bookmark
  • Use the Next Page and Previous Page arrows on the command bar to navigate to the destination in the PDF document to which you want the bookmark to link, then right click and click Set Destination.
  • If need to, you can drag and drop the newly created bookmark to the desire position in relation to other bookmarks

Edit bookmarks with Acrobat Professional 9

Although you can set destination for bookmarks as you create them, sometimes it’s easier to create all bookmark labels now, then set the destinations later. You can edit the bookmarks by changing text, destination, parent-child relationship among bookmarks, or changing bookmark text/label appearance. To edit a bookmark:

  • To change label text: Select the bookmark, click inside the bookmark text box, and type in the new text.
  • To edit/set a bookmark destination: Select the bookmark, and move to the page or location on a page you want to use as the new destination; right click, then choose Set Destination. The bookmark is now set to the new location.
  • To edit a bookmark’s appearance [bold, color…]: Right click on the bookmark, then choose Bookmark Properties, and select a color and text style for the bookmark.

Display bookmark panel by default

Another thing you may need to do is to set the document properties so that your bookmark panel will be automatically opened when the document is open. To do this, you can:

  • Go to File > Properties
  • Click on Initial View tab
  • Select Bookmark Panel and Page from the drop-down menu Navigation tab
  • Click OK and you’re done. The next time you open your document, the bookmark panel will be displayed by default

Optimized PDF for fast web view

To check whether your document is optimized for fast web view, go to File > Properties and look at the bottom right of the dialog box where you’ll find the Fast web view information. If it’s a yes, your document is already optimized. If it’s a no, you can easily optimized the PDF by doing a File > Save As, then select Adobe PDF Files, Optimized in the Save as file type drop-down; click Save and you’re done.


Again, hope this is helpful. Happy PDFing!


Feedback icon   Love it or hate it? Let me know what you think through the comment box below.


Related Posts:


5 Responses to How To Use Adobe Acrobat Professional 9

  1. my boss was needing DHS 11000-9 some time ago and was made aware of a document management site that has a lot of fillable forms . If people have been needing DHS 11000-9 as well.

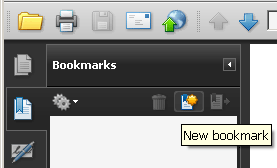
  2. An easier way to create new bookmarks is to select the text/title text on the page you want to create the bookmark; then right click on the selected text and click “Add Bookmark” or Ctrl B. The highlighted text will be automatically appear on the bookmark panel. This way you won’t have to type the bookmark labels.

Leave a Reply

Your email address will not be published. Required fields are marked *