Archive: Softwares

Web Graphics – Create Web Graphics In Photoshop P3

Create web graphics with Photoshop – The Fundamentals
Part 3 – Essential Tools

Photoshop web graphics

This is the third and probably the last post for the series of posts about Creating web graphics with Photoshop. Part 1 again deals with different image types supported by web browsers; part 2 focuses on saving images for the web; and this part, part 3, is about Photoshop essential tools: the Layer palette, the History palette, Crop tool, Text tool, Eyedropper tool, and Image Adjustments menu.

Why those tools but not the others?

These are the tools I use most frequently to create web graphics and update images on websites. Plus, their usage is the one I often got asked about by others.

Create a Drop-down Menu with Dreamweaver CS4

How to create a cross-browser drop-down menu with Dreamweaver in minutes

Create drop-down menu with Dreamweaver

This is going to be short and the main purpose is to let you know Dreamweaver CS4 has a built-in functionality letting you create a good CSS-based drop-down menu in minutes. I’m not sure at what version Dreamweaver started to have this built-in drop-down generator. Perhaps it was from CS3.

The dropdown is CSS/text-based, very easy to customize and maintain and works well with different browsers even when you have a big Flash or image banner right underneath.


When Dreamweaver Has a Complete Advantage

Some cases when Dreamweaver has a complete advantage over web text editors

Dreamweaver

Dreamweaver is considered by many one of the best HTML editors, if not THE BEST HTML editor currently available. It’s more than just another WYSIWYG [What you see is what you get] software where you can design/develop web page without having to know HTML. I will have multiple posts about Dreamweaver and how to use it to create websites and HTML emails for marketing professionals. This post is going to be about how using Dreamweaver saved me and probably you lots of time and efforts compared to using a text editor.


Free Online Photo Editing Applications

Want to edit your photos but don’t want to install any software? Use free online photo editing applications.

Free online image editor

Already knew about several great free image editors but don’t feel like them, let’s start exploring some other option: free online photo editing applications. These are web-based applications, so you only need to go to some websites and edit your photos online; and they’re free [at the time of writing this article].

Also, since you don’t have to install anything, you can test out as many applications as you want to find out which one you like the best. There’s no harm done to your computer, again no installation and no un-installation. You may have to sign up for a free account in order to use the application.


MS Excel Dropdown List

Create a dropdown with Excel 2003

Dropdown list in Excel

If you’re using Excel 2010, click here for an updated post.

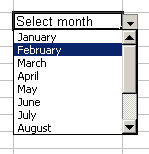
Just like a drop-down list on a web page, the drop-down list on an Excel spreadsheet presents a [limited] number of options for you to select, thus limit potential data entry errors and make the output more consistent and uniform. The drop-down list mentioned in this post has a down arrow button, but it is not the Filter/AutoFilter functionality of Excel, which can be accessed through menu Data > Filter > AutoFilter.


Web Graphics – Create Web Graphics In Photoshop P2

Create web graphics with Photoshop – The Fundamentals
Part 2 – Save image for the web / Optimize image for the web

Photoshop web graphics

Already know about different image types supported by web browsers, below are some simple steps to save your images for the web with Photoshop.

To save image for the web or to optimize it for the web, you just need to open your image in Photoshop, then go to menu File > Save for Web or File > Save for Web & Devices with CS4, or you can use the combination of keys Ctrl Alt Shift S. No matter what versions of Photoshop you’re using, a dialog box will appear to let you change your image settings and your image size. That’s basically it.